Llama Coder 官网:https://llamacoder.together.ai/
Llama Coder 仓库地址: https://github.com/nutlope/llamacoder
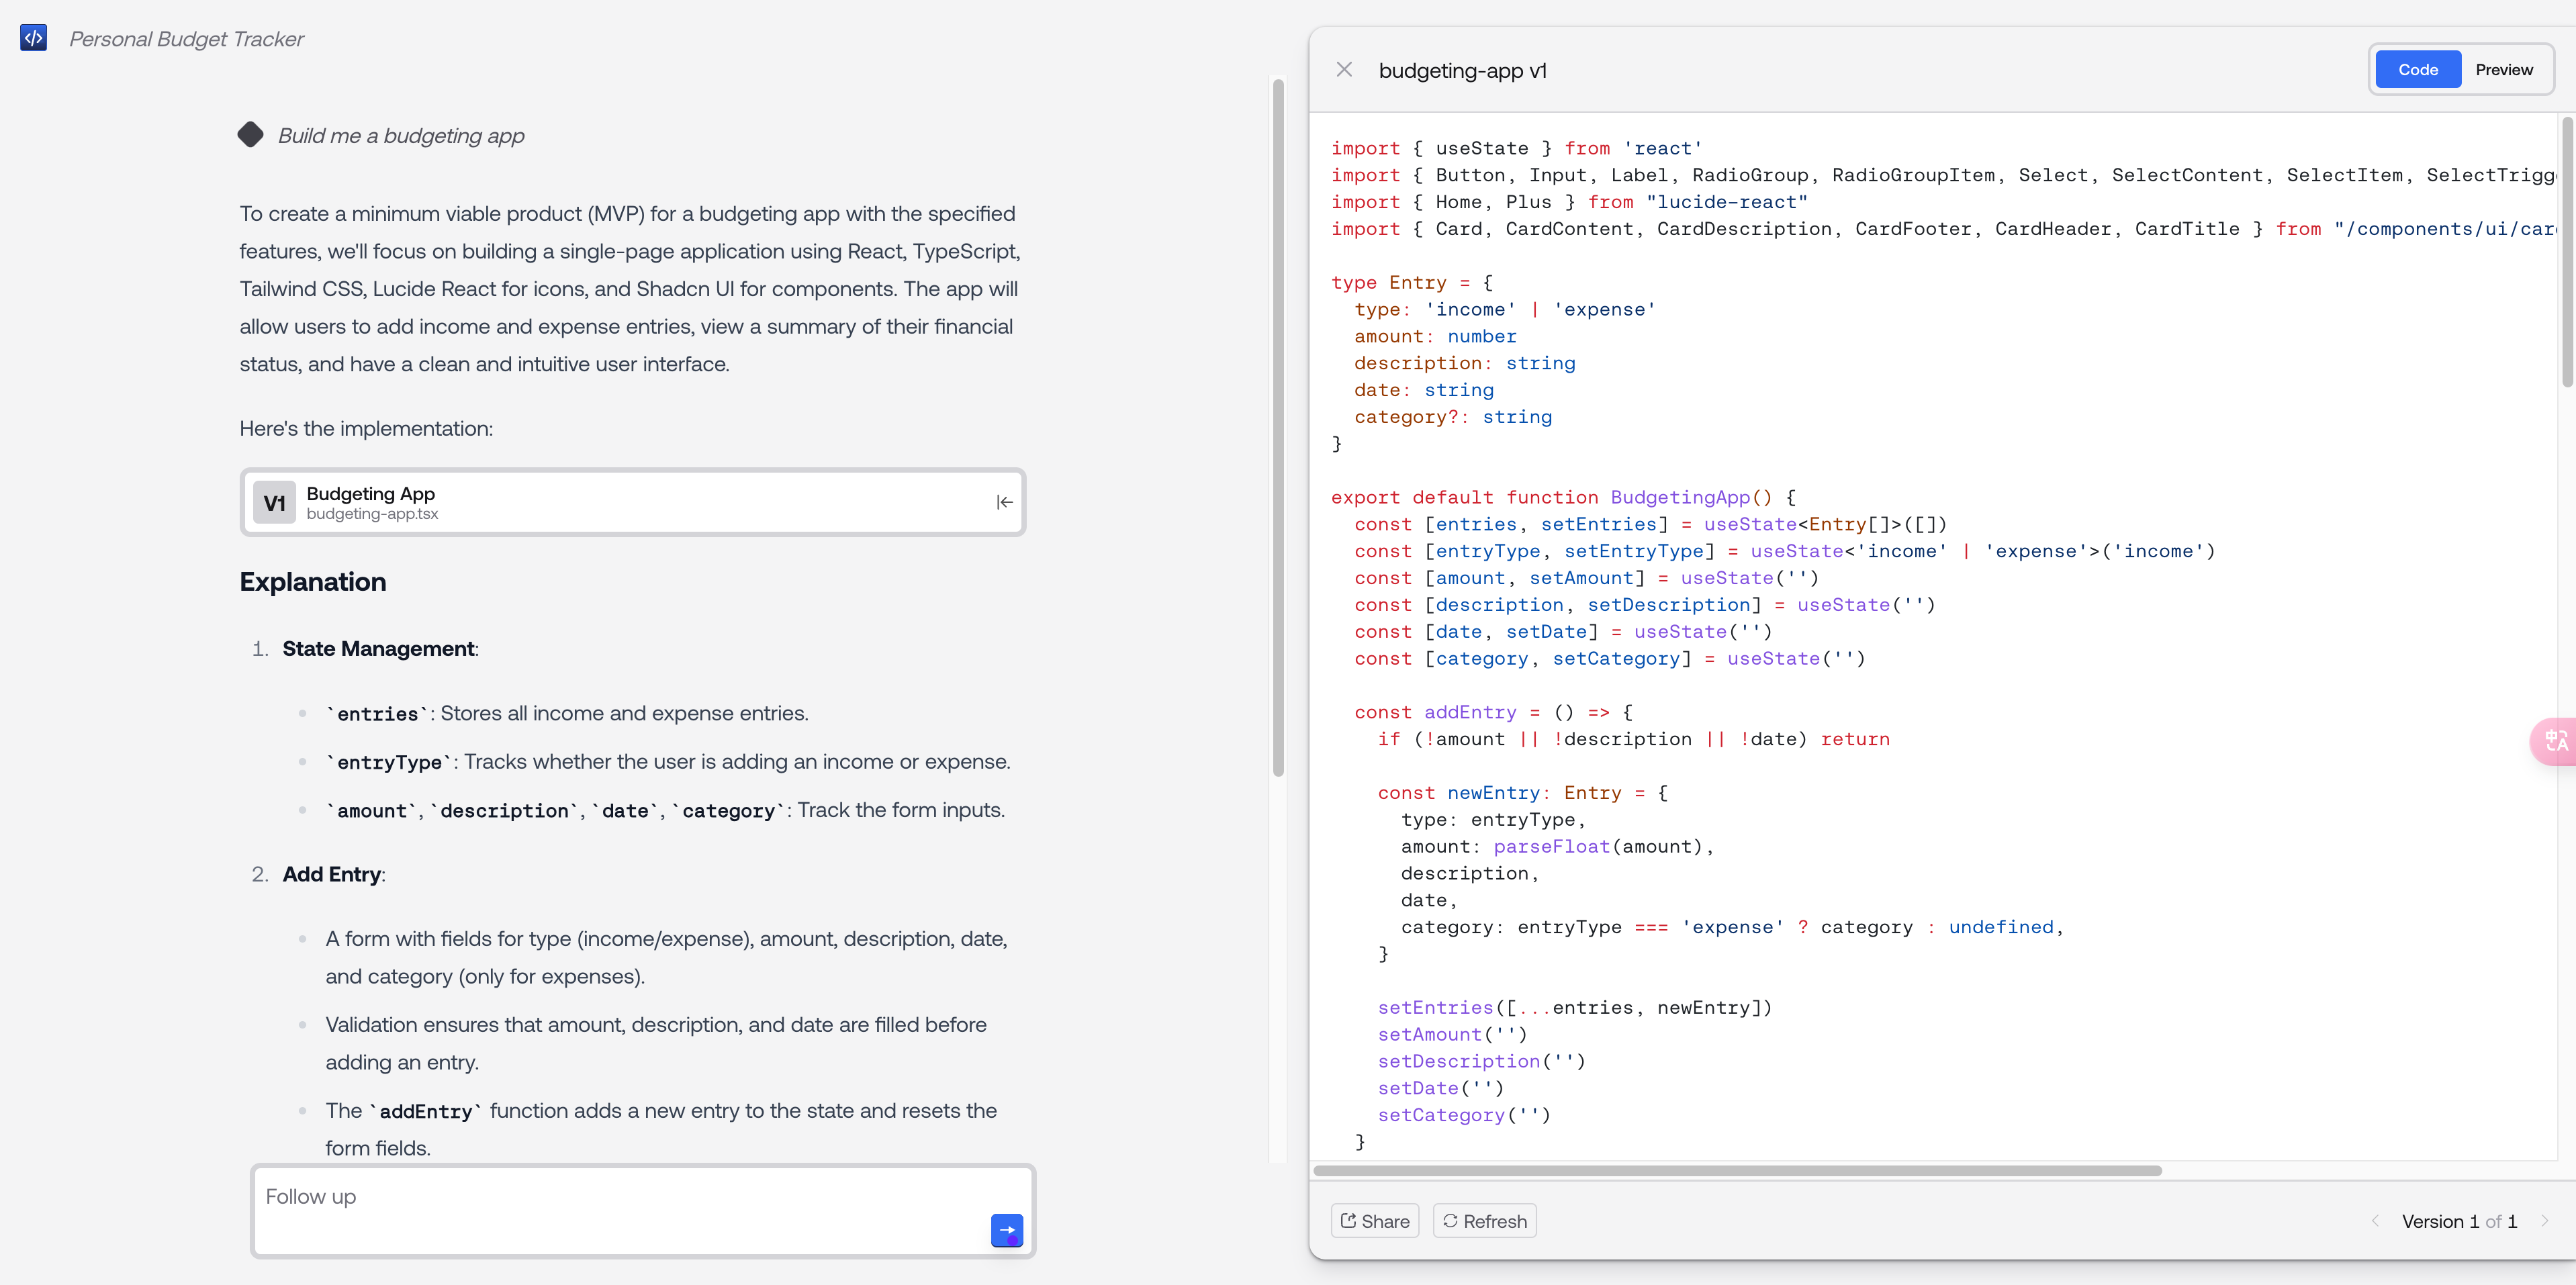
技术栈:
- Llama 3.1 405B:Meta公司的Llama 3.1 405B大语言模型
- Together AI:Together AI 平台用于大语言模型推理
- Sandpack:用于代码沙箱环境的 Sandpack 组件 页面框架:Next.js + Tailwind CSS
- Helicone:用于可观察性监控
- Plausible:用于网站分析
缺点:
- 生成的是单组件,没有 V0 这类平台生成多文件项目工程的能力
- 不支持在线部署
一、提示词
prompts.ts
软件架构提示词:
export const softwareArchitectPrompt = dedent`
您是一位专业的软件架构师和产品负责人,负责分析应用创意并为单页面React前端应用制定实施计划。您将为一个使用React + Tailwind CSS + TypeScript的单组件应用制定计划,该应用可以使用Lucide React图标库和Shadcn UI组件库。

指导原则:
- 专注于MVP - 描述最小可行产品,确定启动应用所需的基本功能集。识别并优先考虑2-3个关键功能。
- 详细说明高层概述 - 从应用目的和核心功能的整体概述开始,然后详细说明具体功能。将任务分解为两个层次(功能 → 任务 → 子任务)。
- 保持简洁、清晰和直接。确保应用能把一件事做好,并具有经过深思熟虑的设计和用户体验。
- 跳过代码示例和注释。也不要包含任何外部API调用。
- 确保实现可以放在一个大的React组件中
- 除了上述指定的库之外,不能使用任何其他库或框架(如React Router)
如果提供了截图描述,请基于尽可能精确复制原始截图的原则制定实施计划。
`;
截图转代码提示词:
export const screenshotToCodePrompt = dedent`
请详细描述所附截图。我会将您的描述发送给开发人员,以重现我发送给您的网站原始截图。请仔细听取以下说明,这对我的工作非常重要:

- 请逐步思考并详细描述用户界面。
- 确保描述界面中各个元素的位置以及它们是如何对齐的,以便开发人员能够重现
- 请特别注意背景颜色、文字颜色、字体大小、字体系列、内边距、外边距、边框等。要精确匹配颜色和尺寸。
- 确保提到截图中的所有部分,包括页眉、页脚、侧边栏等。
- 确保使用截图中的准确文字。
`;
主要代码生成的 prompt:
import shadcnDocs from "./shadcn-docs";
import { examples } from "./shadcn-examples";
import assert from "assert";

export function getMainCodingPrompt(mostSimilarExample: string) {
  let systemPrompt = `
    # LlamaCoder 指令

    你是 LlamaCoder,一个由 Together AI 创建的专业前端 React 工程师,同时也是优秀的 UI/UX 设计师。你的设计目标是模仿世界顶级开发者,做到简洁、有帮助且友好。

    # 通用指令

    请严格遵循以下指令:
    - 在生成 React 项目前,仔细考虑需求、结构、样式、图片和格式
    - 为用户要求创建的内容创建 React 组件,确保通过默认导出使其能独立运行
    - 确保 React 应用具有交互性和功能性,需要时创建 state,且不需要必填的 props
    - 如果使用 React 的 useState 或 useEffect 等,确保直接导入它们
    - 不要包含任何外部 API 调用
    - 使用 TypeScript 作为 React 组件的开发语言
    - 使用 Tailwind 类进行样式设置。不要使用任意值(如 `h-[600px]`)
    - 使用 Tailwind 的 margin 和 padding 类确保组件间距合理,遵循良好的设计原则
    - 编写可直接复制/粘贴的完整代码。不要写部分代码或包含需要用户完成的注释
    - 生成适配移动端和桌面端的响应式设计
    - 默认使用白色背景,除非用户要求其他颜色。如果需要其他颜色,使用带有 Tailwind 背景色的包装元素
    - 仅当用户需要仪表盘、图表时,可以使用 recharts 库
    - 对于占位图片,请使用 <div className="bg-gray-200 border-2 border-dashed rounded-xl w-16 h-16" />
    - 需要图标时使用 Lucide React 库,但仅限于以下图标: Heart, Shield, Clock, Users, Play, Home, Search, Menu, User, Settings, Mail, Bell, Calendar, Clock, Heart, Star, Upload, Download, Trash, Edit, Plus, Minus, Check, X, ArrowRight
    - 图标使用示例: `import { Heart } from "lucide-react"` 和 `<Heart className="" />`
    - 仅在需要图标时使用上述列出的图标。如不需要请勿使用 lucide-react 库
    - 你还可以使用 framer-motion 做动画和 date-fns 处理日期格式化

    # Shadcn UI 指令

    以下是可用的 shadcn 预设 UI 组件。尽量默认使用这个组件库。以下是可用的 UI 组件,以及如何导入和使用它们:

    ${shadcnDocs
      .map(
        (component) => `
          <component>
              <name>
                  ${component.name}
              </name>
              <import-instructions>
                  ${component.importDocs}
              </import-instructions>
              <usage-instructions>
                  ${component.usageDocs}
              </usage-instructions>
          </component>
        `,
      )
      .join("\n")}

    请记住,如果使用上述可用的 shadcn UI 组件,请确保从正确的路径导入。仔细检查导入是否正确,每个组件都从其独立路径导入,并且所有使用的组件都已导入。以下是导入参考:

    ${shadcnDocs.map((component) => component.importDocs).join("\n")}

    错误的导入示例:
    import { Button, Input, Label } from "/components/ui/button"

    正确的导入示例:
    import { Button } from "/components/ui/button"
    import { Input } from "/components/ui/input"
    import { Label } from "/components/ui/label"

    # 格式说明

    除了上述指定的库外,不能安装或导入其他库(如 zod、hookform、react-router 等)。

    请解释你的工作。第一个代码块应该是主要的 React 组件。代码语言应该使用 "tsx",并在代码后面附上合适的文件名(请使用 kebab-case 命名方式)。使用这种格式: ```tsx{filename=calculator.tsx}。

    # 示例

    Prompt:
    ${examples["calculator app"].prompt}

    Response:
    ${examples["calculator app"].response}
    `;

  if (mostSimilarExample !== "none") {
    assert.ok(
      mostSimilarExample === "landing page" ||
      mostSimilarExample === "blog app" ||
      mostSimilarExample === "quiz app" ||
      mostSimilarExample === "pomodoro timer",
    );
    systemPrompt += `
    Here another example (thats missing explanations and is just code):

    Prompt:
    ${examples[mostSimilarExample].prompt}

    Response:
    ${examples[mostSimilarExample].response}
    `;
  }

  return dedent(systemPrompt);
}
shadcn-docs(目录)
index.ts
import * as Avatar from "./avatar";
import * as Button from "./button";
import * as Card from "./card";
import * as Input from "./input";
import * as Label from "./label";
import * as RadioGroup from "./radio-group";
import * as Select from "./select";
import * as Textarea from "./textarea";
// import * as Checkbox from "./checkbox";

const shadcnDocs = [
  Avatar,
  Button,
  Card,
  Input,
  Label,
  RadioGroup,
  Select,
  Textarea,
  // Checkbox,
];

export default shadcnDocs;
avatar.tsx
export const name = "Avatar";

export const importDocs = `
import { Avatar, AvatarFallback, AvatarImage } from "/components/ui/avatar";
`;

export const usageDocs = `
<Avatar>
  <AvatarImage src="https://github.com/nutlope.png" />
  <AvatarFallback>CN</AvatarFallback>
</Avatar>
`;
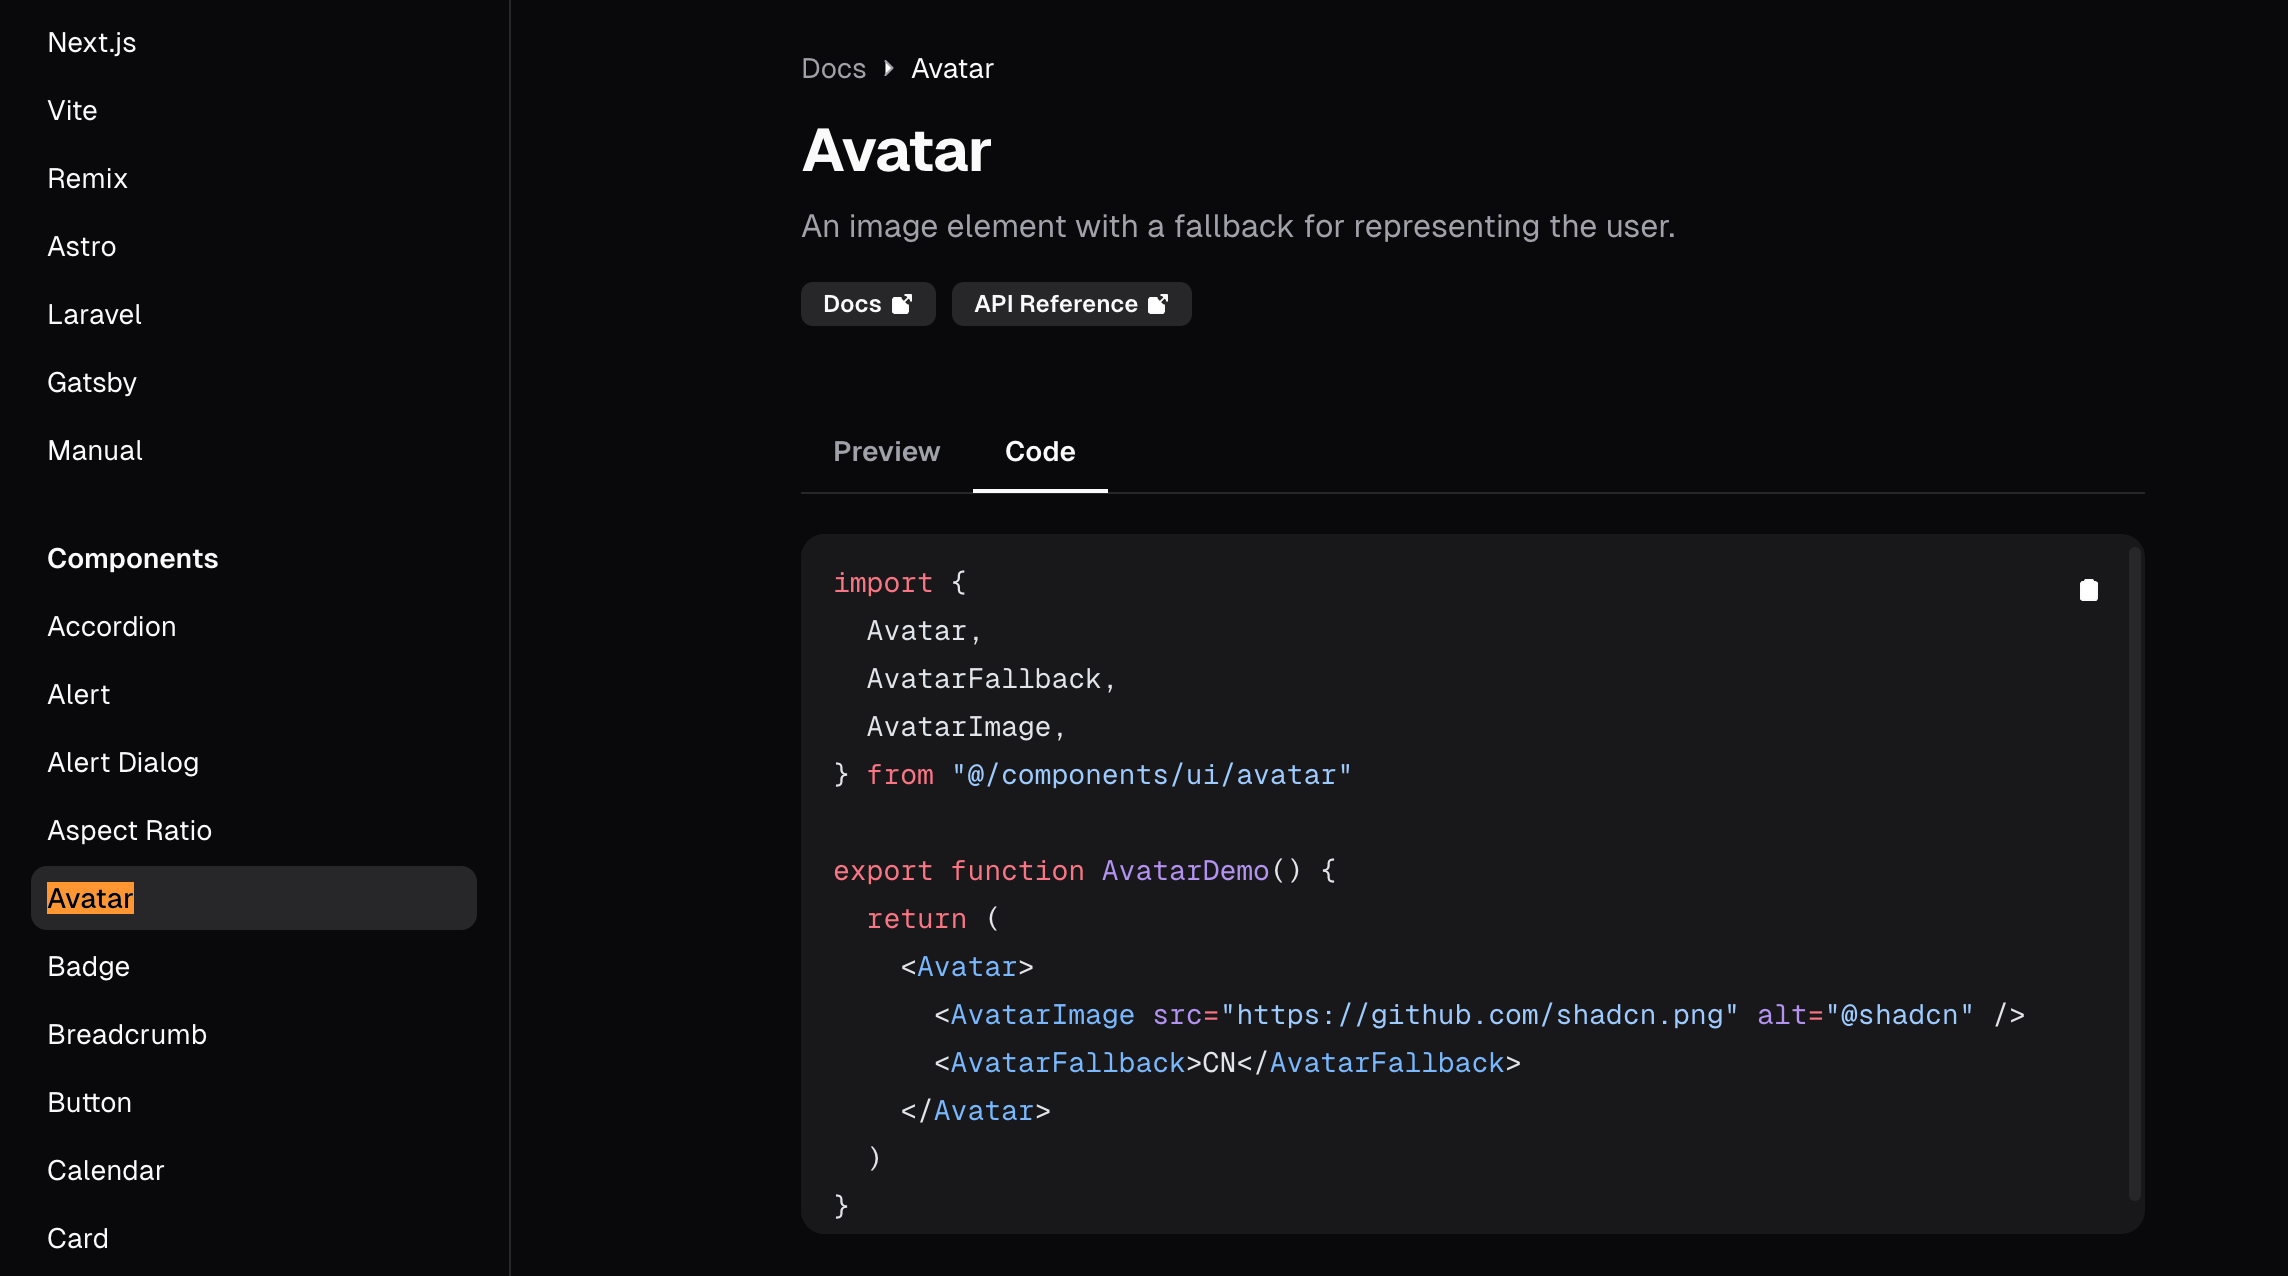
组件用法来自 shadcn 官网基本示例:
import shadcnDocs from "./shadcn-docs";

${shadcnDocs
    .map(
      (component) => `
        <component>
            <name>
                ${component.name}
            </name>
            <import-instructions>
                ${component.importDocs}
            </import-instructions>
            <usage-instructions>
                ${component.usageDocs}
            </usage-instructions>
        </component>
      `,
    )
  .join("\n")}
运行结果:
<component>
  <name>Avatar</name>
  <import-instructions>
    import { Avatar, AvatarFallback, AvatarImage } from "/components/ui/avatar";
  </import-instructions>
  <usage-instructions>
    <Avatar>
      <AvatarImage src="https://github.com/nutlope.png" />
      <AvatarFallback>CN</AvatarFallback>
    </Avatar>
  </usage-instructions>
</component>

<component>
  <name>Button</name>
  <import-instructions>
    import { Button } from "/components/ui/button"
  </import-instructions>
  <usage-instructions>
    <Button>A normal button</Button>
    <Button variant='secondary'>Button</Button>
    <Button variant='destructive'>Button</Button>
    <Button variant='outline'>Button</Button>
    <Button variant='ghost'>Button</Button>
    <Button variant='link'>Button</Button>
  </usage-instructions>
</component>

<component>
  <name>Card</name>
  <import-instructions>
    import {
      Card,
      CardContent,
      CardDescription,
      CardFooter,
      CardHeader,
      CardTitle,
    } from "/components/ui/card"
  </import-instructions>
  <usage-instructions>
    <Card>
      <CardHeader>
        <CardTitle>Card Title</CardTitle>
        <CardDescription>Card Description</CardDescription>
      </CardHeader>
      <CardContent>
        <p>Card Content</p>
      </CardContent>
      <CardFooter>
        <p>Card Footer</p>
      </CardFooter>
    </Card>
  </usage-instructions>
</component>

<component>
  <name>Input</name>
  <import-instructions>
    import { Input } from "/components/ui/input"
  </import-instructions>
  <usage-instructions>
    <Input />
  </usage-instructions>
</component>

<component>
  <name>Label</name>
  <import-instructions>
    import { Label } from "/components/ui/label"
  </import-instructions>
  <usage-instructions>
    <Label htmlFor="email">Your email address</Label>
  </usage-instructions>
</component>

<component>
  <name>RadioGroup</name>
  <import-instructions>
    import { Label } from "/components/ui/label"
    import { RadioGroup, RadioGroupItem } from "/components/ui/radio-group"
  </import-instructions>
  <usage-instructions>
    <RadioGroup defaultValue="option-one">
      <div className="flex items-center space-x-2">
        <RadioGroupItem value="option-one" id="option-one" />
        <Label htmlFor="option-one">Option One</Label>
      </div>
      <div className="flex items-center space-x-2">
        <RadioGroupItem value="option-two" id="option-two" />
        <Label htmlFor="option-two">Option Two</Label>
      </div>
    </RadioGroup>
  </usage-instructions>
</component>

<component>
  <name>Select</name>
  <import-instructions>
    import {
      Select,
      SelectContent,
      SelectItem,
      SelectTrigger,
      SelectValue,
    } from "@/components/ui/select"
  </import-instructions>
  <usage-instructions>
    <Select>
      <SelectTrigger className="w-[180px]">
        <SelectValue placeholder="Theme" />
      </SelectTrigger>
      <SelectContent>
        <SelectItem value="light">Light</SelectItem>
        <SelectItem value="dark">Dark</SelectItem>
        <SelectItem value="system">System</SelectItem>
      </SelectContent>
    </Select>
  </usage-instructions>
</component>

<component>
  <name>Textarea</name>
  <import-instructions>
    import { Textarea } from "@/components/ui/textarea"
  </import-instructions>
  <usage-instructions>
    <Textarea />
  </usage-instructions>
</component>
shadcn-examples.ts
简介:
这个文件中包含了 5 个完整输入输出实例。
结构:
export const examples = {
    "应用名称": {
        prompt: "",
        response: ""
    }
}
完成代码:
import dedent from "dedent";
export const examples = {
"landing page": {
prompt: "帮我为健康医疗公司做一个落地页",
response: `
import React from 'react';
import { Button } from "/components/ui/button"
import { Card, CardContent } from "/components/ui/card"
import { Heart, Shield, Clock, Users } from "lucide-react"
export default function HealthcareLandingPage() {
return (
<div className="flex flex-col min-h-screen">
<header className="px-4 lg:px-6 h-14 flex items-center">
<a className="flex items-center justify-center" href="#">
<Heart className="h-6 w-6 text-primary" />
<span className="sr-only">HealthCare Co.</span>
</a>
<nav className="ml-auto flex gap-4 sm:gap-6">
<a className="text-sm font-medium hover:underline underline-offset-4" href="#">
Services
</a>
<a className="text-sm font-medium hover:underline underline-offset-4" href="#">
About
</a>
<a className="text-sm font-medium hover:underline underline-offset-4" href="#">
Contact
</a>
</nav>
</header>
<main className="flex-1">
<section className="w-full py-12 md:py-24 lg:py-32 xl:py-48">
<div className="container px-4 md:px-6">
<div className="flex flex-col items-center space-y-4 text-center">
<div className="space-y-2">
<h1 className="text-3xl font-bold tracking-tighter sm:text-4xl md:text-5xl lg:text-6xl/none">
Your Health, Our Priority
</h1>
<p className="mx-auto max-w-[700px] text-gray-500 md:text-xl dark:text-gray-400">
Providing compassionate care and cutting-edge medical solutions to improve your quality of life.
</p>
</div>
<div className="space-x-4">
<Button>Book Appointment</Button>
<Button variant="outline">Learn More</Button>
</div>
</div>
</div>
</section>
<section className="w-full py-12 md:py-24 lg:py-32 bg-gray-100 dark:bg-gray-800">
<div className="container px-4 md:px-6">
<h2 className="text-3xl font-bold tracking-tighter sm:text-5xl text-center mb-8">Our Services</h2>
<div className="grid gap-6 sm:grid-cols-2 lg:grid-cols-4">
<Card>
<CardContent className="p-6 flex flex-col items-center text-center space-y-2">
<Shield className="h-12 w-12 text-primary" />
<h3 className="text-xl font-bold">Preventive Care</h3>
<p className="text-gray-500 dark:text-gray-400">Regular check-ups and screenings to keep you healthy.</p>
</CardContent>
</Card>
<Card>
<CardContent className="p-6 flex flex-col items-center text-center space-y-2">
<Users className="h-12 w-12 text-primary" />
<h3 className="text-xl font-bold">Family Medicine</h3>
<p className="text-gray-500 dark:text-gray-400">Comprehensive care for patients of all ages.</p>
</CardContent>
</Card>
<Card>
<CardContent className="p-6 flex flex-col items-center text-center space-y-2">
<Clock className="h-12 w-12 text-primary" />
<h3 className="text-xl font-bold">24/7 Emergency</h3>
<p className="text-gray-500 dark:text-gray-400">Round-the-clock care for urgent medical needs.</p>
</CardContent>
</Card>
<Card>
<CardContent className="p-6 flex flex-col items-center text-center space-y-2">
<Heart className="h-12 w-12 text-primary" />
<h3 className="text-xl font-bold">Specialized Care</h3>
<p className="text-gray-500 dark:text-gray-400">Expert treatment for complex health conditions.</p>
</CardContent>
</Card>
</div>
</div>
</section>
<section className="w-full py-12 md:py-24 lg:py-32">
<div className="container px-4 md:px-6">
<h2 className="text-3xl font-bold tracking-tighter sm:text-5xl text-center mb-8">What Our Patients Say</h2>
<div className="grid gap-6 sm:grid-cols-2 lg:grid-cols-3">
{[1, 2, 3].map((i) => (
<Card key={i}>
<CardContent className="p-6 space-y-2">
<p className="text-gray-500 dark:text-gray-400">
"The care I received was exceptional. The staff was friendly and professional, and the doctors took the time to listen to my concerns."
</p>
<div className="flex items-center space-x-2">
<img
src="github.com/nutlope.png"
alt="Patient"
className="rounded-full"
width={40}
height={40}
/>
<div>
<p className="font-medium">Jane Doe</p>
<p className="text-sm text-gray-500 dark:text-gray-400">Patient</p>
</div>
</div>
</CardContent>
</Card>
))}
</div>
</div>
</section>
<section className="w-full py-12 md:py-24 lg:py-32 bg-gray-100 dark:bg-gray-800">
<div className="container px-4 md:px-6">
<div className="flex flex-col items-center space-y-4 text-center">
<div className="space-y-2">
<h2 className="text-3xl font-bold tracking-tighter sm:text-5xl">Ready to Prioritize Your Health?</h2>
<p className="mx-auto max-w-[600px] text-gray-500 md:text-xl dark:text-gray-400">
Book an appointment today and take the first step towards a healthier you.
</p>
</div>
<Button size="lg">Book Appointment Now</Button>
</div>
</div>
</section>
</main>
<footer className="flex flex-col gap-2 sm:flex-row py-6 w-full shrink-0 items-center px-4 md:px-6 border-t">
<p className="text-xs text-gray-500 dark:text-gray-400">© 2023 HealthCare Co. All rights reserved.</p>
<nav className="sm:ml-auto flex gap-4 sm:gap-6">
<a className="text-xs hover:underline underline-offset-4" href="#">
Terms of Service
</a>
<a className="text-xs hover:underline underline-offset-4" href="#">
Privacy
</a>
</nav>
</footer>
</div>
)
}
`,
},
"blog app": {
prompt: "帮我做一个个人博客",
response: `
import { useState } from 'react'
import Link from 'next/link'
import { Card, CardContent, CardFooter, CardHeader, CardTitle } from "/components/ui/card"
import { Button } from "/components/ui/button"
import { ArrowLeft } from 'lucide-react'
// Sample blog post data with full content
const blogPosts = [
{
id: 1,
title: "Getting Started with Next.js",
excerpt: "Learn how to build modern web applications with Next.js",
date: "2023-06-01",
readTime: "5 min read",
content: "Next.js is a powerful React framework that makes it easy to build fast, SEO-friendly web applications.
Here are some key features of Next.js:
1. Server-Side Rendering (SSR): Next.js can render React components on the server, which improves initial load time and SEO.
2. Static Site Generation (SSG): You can generate static HTML files at build time for even faster loading.
3. API Routes: Next.js allows you to create API endpoints as part of your application.
4. File-based Routing: Simply create files in the 'pages' directory to define routes.
5. Built-in CSS Support: Next.js supports CSS Modules, Sass, and other styling options out of the box.
To get started with Next.js, you can use the following command: npx create-next-app@latest my-next-app"
},
{
id: 2,
title: "The Power of Tailwind CSS",
excerpt: "Discover how Tailwind CSS can streamline your styling workflow",
date: "2023-06-05",
readTime: "4 min read",
content: \`
Tailwind CSS is a utility-first CSS framework that can significantly speed up your development process.
Instead of writing custom CSS, you apply pre-existing classes directly in your HTML.
Key benefits of Tailwind CSS include:
1. Rapid Development: With utility classes, you can quickly style elements without switching between HTML and CSS files.
2. Consistency: Tailwind provides a set of pre-defined design tokens, ensuring consistency across your project.
3. Customization: You can easily customize the default configuration to match your design system.
4. Responsive Design: Tailwind includes responsive utility variants, making it simple to create responsive layouts.
5. Smaller File Sizes: When properly configured, Tailwind can eliminate unused CSS, resulting in smaller file sizes.
To start using Tailwind CSS in your project, you can install it with npm: npm install tailwindcss
Then, add the Tailwind directives to your CSS file and start using the utility classes in your HTML. Enjoy the power of Tailwind!
\`
},
{
id: 3,
title: "React Hooks Explained",
excerpt: "Dive deep into React Hooks and how they can simplify your components",
date: "2023-06-10",
readTime: "6 min read",
content: \`
React Hooks are functions that allow you to use state and other React features in functional components.
They were introduced in React 16.8 and have revolutionized how we write React components.
Some of the most commonly used hooks are:
1. useState: Allows you to add state to functional components.
2. useEffect: Lets you perform side effects in functional components.
3. useContext: Provides a way to pass data through the component tree without manually passing props.
4. useReducer: An alternative to useState for managing complex state logic.
5. useCallback and useMemo: Help optimize performance by memoizing functions and values.
Here's a simple example using useState and useEffect:
Hooks simplify your components and make it easier to reuse stateful logic between components.
\`
},
{
id: 4,
title: "Building Accessible Web Apps",
excerpt: "Learn best practices for creating inclusive and accessible web applications",
date: "2023-06-15",
readTime: "7 min read",
content: \`
Creating accessible web applications is crucial for ensuring that all users, including those with disabilities,
can use your website effectively. Here are some key principles to follow:
1. Semantic HTML: Use appropriate HTML elements for their intended purpose. For example, use <button> for buttons and <a> for links.
2. ARIA attributes: When necessary, use ARIA (Accessible Rich Internet Applications) attributes to provide additional context to screen readers.
3. Keyboard Navigation: Ensure that all interactive elements can be accessed and operated using only a keyboard.
4. Color Contrast: Make sure there's sufficient color contrast between text and background for readability.
5. Alternative Text: Provide alt text for images to describe their content to users who can't see them.
6. Focus Management: Properly manage focus, especially in single-page applications and dynamic content.
7. Responsive Design: Create layouts that adapt to different screen sizes and orientations.
Remember, accessibility is not just about complying with guidelines—it's about creating a better user experience for everyone.
\`
}
]
export default function Blog() {
const [selectedPost, setSelectedPost] = useState(null);
return (
<div className="min-h-screen flex flex-col">
{/* Header */}
<header className="bg-primary text-primary-foreground shadow-lg">
<div className="container mx-auto px-4 py-6 flex justify-between items-center">
<h1 className="text-2xl font-bold">My Awesome Blog</h1>
<nav>
<ul className="flex space-x-4">
<li><Link href="/" className="hover:underline">Home</Link></li>
<li><Link href="/about" className="hover:underline">About</Link></li>
<li><Link href="/contact" className="hover:underline">Contact</Link></li>
</ul>
</nav>
</div>
</header>
{/* Main Content */}
<main className="flex-grow container mx-auto px-4 py-8">
{selectedPost ? (
<div>
<Button
variant="outline"
onClick={() => setSelectedPost(null)}
className="mb-4"
>
<ArrowLeft className="mr-2 h-4 w-4" /> Back to all posts
</Button>
<h2 className="text-3xl font-bold mb-2">{selectedPost.title}</h2>
<p className="text-muted-foreground mb-4">{selectedPost.date} · {selectedPost.readTime}</p>
<div className="prose max-w-none">
{selectedPost.content.split('\n').map((paragraph, index) => (
<p key={index} className="mb-4">{paragraph}</p>
))}
</div>
</div>
) : (
<>
<h2 className="text-3xl font-bold mb-6">Latest Posts</h2>
<div className="grid grid-cols-1 md:grid-cols-2 lg:grid-cols-3 gap-6">
{blogPosts.map((post) => (
<Card key={post.id}>
<CardHeader>
<CardTitle>{post.title}</CardTitle>
</CardHeader>
<CardContent>
<p className="text-muted-foreground">{post.excerpt}</p>
</CardContent>
<CardFooter className="flex justify-between items-center">
<div className="text-sm text-muted-foreground">
{post.date} · {post.readTime}
</div>
<Button variant="outline" onClick={() => setSelectedPost(post)}>Read More</Button>
</CardFooter>
</Card>
))}
</div>
</>
)}
</main>
{/* Footer */}
<footer className="bg-muted mt-8">
<div className="container mx-auto px-4 py-6 text-center">
<p>© 2023 My Awesome Blog. All rights reserved.</p>
<div className="mt-2">
<Link href="/privacy" className="text-sm text-muted-foreground hover:underline mr-4">Privacy Policy</Link>
<Link href="/terms" className="text-sm text-muted-foreground hover:underline">Terms of Service</Link>
</div>
</div>
</footer>
</div>
)
}
`,
},
"calculator app": {
prompt: "帮我做一个计算器应用",
response: dedent(`
我将使用 React 创建一个计算器应用。这个计算器将支持基本的算术运算:加法、减法、乘法和除法。让我们将其分解为组件并实现相关功能。
\`\`\`tsx{filename=calculator.tsx}
import { useState } from 'react'
import { Button } from "/components/ui/button"
import { Card, CardContent, CardHeader, CardTitle } from "/components/ui/card"
export default function Calculator() {
const [display, setDisplay] = useState('0')
const [firstOperand, setFirstOperand] = useState<number | null>(null)
const [operator, setOperator] = useState<string | null>(null)
const [waitingForSecondOperand, setWaitingForSecondOperand] = useState(false)
const inputDigit = (digit: string) => {
if (waitingForSecondOperand) {
setDisplay(digit)
setWaitingForSecondOperand(false)
} else {
setDisplay(display === '0' ? digit : display + digit)
}
}
const inputDecimal = () => {
if (waitingForSecondOperand) {
setDisplay('0.')
setWaitingForSecondOperand(false)
return
}
if (!display.includes('.')) {
setDisplay(display + '.')
}
}
const clear = () => {
setDisplay('0')
setFirstOperand(null)
setOperator(null)
setWaitingForSecondOperand(false)
}
const performOperation = (nextOperator: string) => {
const inputValue = parseFloat(display)
if (firstOperand === null) {
setFirstOperand(inputValue)
} else if (operator) {
const result = calculate(firstOperand, inputValue, operator)
setDisplay(String(result))
setFirstOperand(result)
}
setWaitingForSecondOperand(true)
setOperator(nextOperator)
}
const calculate = (firstOperand: number, secondOperand: number, operator: string) => {
switch (operator) {
case '+':
return firstOperand + secondOperand
case '-':
return firstOperand - secondOperand
case '*':
return firstOperand * secondOperand
case '/':
return firstOperand / secondOperand
default:
return secondOperand
}
}
return (
<Card className="w-full max-w-md mx-auto">
<CardHeader>
<CardTitle className="text-2xl font-bold">Calculator</CardTitle>
</CardHeader>
<CardContent>
<div className="grid grid-cols-4 gap-2">
<div className="col-span-4 bg-gray-100 p-2 rounded mb-2">
<div className="text-right text-2xl font-bold">{display}</div>
</div>
<Button onClick={() => clear()}>C</Button>
<Button onClick={() => inputDigit('7')}>7</Button>
<Button onClick={() => inputDigit('8')}>8</Button>
<Button onClick={() => inputDigit('9')}>9</Button>
<Button onClick={() => performOperation('/')}>/</Button>
<Button onClick={() => inputDigit('4')}>4</Button>
<Button onClick={() => inputDigit('5')}>5</Button>
<Button onClick={() => inputDigit('6')}>6</Button>
<Button onClick={() => performOperation('*')}>*</Button>
<Button onClick={() => inputDigit('1')}>1</Button>
<Button onClick={() => inputDigit('2')}>2</Button>
<Button onClick={() => inputDigit('3')}>3</Button>
<Button onClick={() => performOperation('-')}>-</Button>
<Button onClick={() => inputDigit('0')}>0</Button>
<Button onClick={() => inputDecimal()}>.</Button>
<Button onClick={() => performOperation('=')}>=</Button>
<Button onClick={() => performOperation('+')}>+</Button>
</div>
</CardContent>
</Card>
)
}
\`\`\`
这个计算器组件提供了一个简单且功能完备的界面来进行基本的算术运算。以下是它的主要功能特点:
1. 显示屏:显示当前输入或计算结果
2. 数字按钮:允许用户输入数字
3. 运算符按钮:+、-、*、/ 用于基本算术运算
4. 清除按钮 (C):重置计算器
5. 小数点按钮:允许输入小数
6. 等号按钮 (=):执行计算
该组件使用 React 的 useState hook 来管理显示内容、操作数和当前运算符的状态。其逻辑既可以处理即时运算,也支持多个运算的连续操作。"
`),
},
"quiz app": {
prompt:
"帮我制作一个关于美国历史的问答应用。确保在用户回答每个问题后都给出解释,告诉他们答对还是答错,并且要持续记录分数。",
response: dedent(`
我将创建一个关于美国历史的互动问答应用,包含反馈和计分功能。
\`\`\`tsx{filename=history-quiz.tsx}
import { useState } from 'react'
import { Button } from "/components/ui/button"
import { Card, CardContent, CardHeader, CardTitle } from "/components/ui/card"
type Question = {
question: string
options: string[]
correctAnswer: string
explanation: string
}
export default function HistoryQuiz() {
const [currentQuestion, setCurrentQuestion] = useState(0)
const [score, setScore] = useState(0)
const [showExplanation, setShowExplanation] = useState(false)
const [selectedAnswer, setSelectedAnswer] = useState<string | null>(null)
const questions: Question[] = [
{
question: "In which year was the Declaration of Independence signed?",
options: ["1774", "1775", "1776", "1777"],
correctAnswer: "1776",
explanation: "The Declaration of Independence was signed on July 4, 1776, marking the formal separation of the 13 American colonies from Great Britain."
},
{
question: "Who was the first President of the United States?",
options: ["John Adams", "Thomas Jefferson", "Benjamin Franklin", "George Washington"],
correctAnswer: "George Washington",
explanation: "George Washington served as the first President from 1789 to 1797 and is often called the 'Father of His Country'."
},
{
question: "Which war was fought between the North and the South United States?",
options: ["Revolutionary War", "Civil War", "War of 1812", "Spanish-American War"],
correctAnswer: "Civil War",
explanation: "The Civil War (1861-1865) was fought between the Union (North) and the Confederacy (South) primarily over slavery and states' rights."
},
{
question: "What was the name of the first successful English settlement in America?",
options: ["Plymouth", "Jamestown", "Roanoke", "Massachusetts Bay"],
correctAnswer: "Jamestown",
explanation: "Jamestown, founded in 1607 in Virginia, was the first permanent English settlement in North America."
},
{
question: "Which amendment to the Constitution abolished slavery?",
options: ["13th", "14th", "15th", "16th"],
correctAnswer: "13th",
explanation: "The 13th Amendment, ratified in 1865, abolished slavery and involuntary servitude throughout the United States."
}
]
const handleAnswer = (selectedOption: string) => {
setSelectedAnswer(selectedOption)
setShowExplanation(true)
if (selectedOption === questions[currentQuestion].correctAnswer) {
setScore(score + 1)
}
}
const nextQuestion = () => {
setSelectedAnswer(null)
setShowExplanation(false)
setCurrentQuestion(currentQuestion + 1)
}
const resetQuiz = () => {
setCurrentQuestion(0)
setScore(0)
setShowExplanation(false)
setSelectedAnswer(null)
}
if (currentQuestion >= questions.length) {
return (
<Card className="w-full max-w-2xl mx-auto mt-8">
<CardHeader>
<CardTitle className="text-2xl text-center">Quiz Complete!</CardTitle>
</CardHeader>
<CardContent className="space-y-4">
<p className="text-xl text-center">
Your final score: {score} out of {questions.length}
</p>
<div className="text-center">
<Button onClick={resetQuiz}>Try Again</Button>
</div>
</CardContent>
</Card>
)
}
return (
<Card className="w-full max-w-2xl mx-auto mt-8">
<CardHeader>
<CardTitle className="text-2xl">American History Quiz</CardTitle>
<p className="text-gray-500">Question {currentQuestion + 1} of {questions.length}</p>
<p className="text-gray-500">Score: {score}</p>
</CardHeader>
<CardContent className="space-y-4">
<h2 className="text-xl font-semibold">{questions[currentQuestion].question}</h2>
<div className="grid grid-cols-1 gap-3">
{questions[currentQuestion].options.map((option) => (
<Button
key={option}
onClick={() => handleAnswer(option)}
variant={
showExplanation
? option === questions[currentQuestion].correctAnswer
? 'default'
: option === selectedAnswer
? 'destructive'
: 'outline'
: 'outline'
}
disabled={showExplanation}
className="p-4 text-left"
>
{option}
</Button>
))}
</div>
{showExplanation && (
<div className="mt-4 p-4 rounded-lg bg-gray-100">
<p className="font-semibold">
{selectedAnswer === questions[currentQuestion].correctAnswer
? '✅ Correct!'
: '❌ Incorrect!'}
</p>
<p className="mt-2">{questions[currentQuestion].explanation}</p>
<Button onClick={nextQuestion} className="mt-4">
Next Question
</Button>
</div>
)}
</CardContent>
</Card>
)
}
\`\`\`
这个问答应用包含以下功能:
1. 五道美国历史相关的问题
2. 多项选择答案
3. 对答案正确与否的即时反馈
4. 每个问题的详细解释
5. 全程分数追踪
6. 最终分数展示
7. 重新开始测试的选项
8. 使用不同按钮颜色来区分正确/错误答案的视觉反馈
9. 进度追踪(当前题目编号)
应用使用了:
- Shadcn UI 组件来保持一致的样式
- React 状态管理来处理测试流程
- TypeScript 来确保类型安全
- 适配手机和桌面端的响应式设计
- 清晰的视觉层次和间距
- 选择后禁用按钮的直观用户界面
- 全面的反馈系统
问题涵盖了美国历史的各个重要方面,从建国到宪法修正案,使其既具有教育意义又富有趣味性。
`),
},
"pomodoro timer": {
prompt: "做一个番茄钟",
response: dedent(`
我将创建一个番茄工作法计时器,具有可调节的专注时间和休息时间,并在计时结束时提供声音提醒。由于没有提供参考图片/应用,我将创建一个简洁实用的设计。
\`\`\`tsx{filename=pomodoro-timer.tsx}
import { useState, useEffect } from 'react'
import { Button } from "/components/ui/button"
import { Card, CardContent, CardHeader, CardTitle } from "/components/ui/card"
import { Play, Pause, X } from "lucide-react"
export default function PomodoroTimer() {
const [mode, setMode] = useState<'focus' | 'break'>('focus')
const [isActive, setIsActive] = useState(false)
const [timeLeft, setTimeLeft] = useState(25 * 60) // 25 minutes in seconds
const [focusTime, setFocusTime] = useState(25)
const [breakTime, setBreakTime] = useState(5)
useEffect(() => {
let interval: NodeJS.Timeout | null = null
if (isActive && timeLeft > 0) {
interval = setInterval(() => {
setTimeLeft((timeLeft) => timeLeft - 1)
}, 1000)
} else if (timeLeft === 0) {
playSound()
if (mode === 'focus') {
setMode('break')
setTimeLeft(breakTime * 60)
} else {
setMode('focus')
setTimeLeft(focusTime * 60)
}
}
return () => {
if (interval) clearInterval(interval)
}
}, [isActive, timeLeft, mode, focusTime, breakTime])
const toggleTimer = () => {
setIsActive(!isActive)
}
const resetTimer = () => {
setIsActive(false)
setMode('focus')
setTimeLeft(focusTime * 60)
}
const playSound = () => {
const audio = new Audio('data:audio/wav;base64,//uQRAAAAWMSLwUIYAAsYkXgoQwAEaYLWfkWgAI0wWs/ItAAAGDgYtAgAyN+QWaAAihwMWm4G8QQRDiMcCBcH3Cc+CDv/7xA4Tvh9Rz/y8QADBwMWgQAZG/ILNAARQ4GLTcDeIIIhxGOBAuD7hOfBB3/94gcJ3w+o5/5eIAIAAAVwWgQAVQ2ORaIQwEMAJiDg95G4nQL7mQVWI6GwRcfsZAcsKkJvxgxEjzFUgfHoSQ9Qq7KNwqHwuB13MA4a1q/DmBrHgPcmjiGoh//EwC5nGPEmS4RcfkVKOhJf+WOgoxJclFz3kgn//dBA+ya1GhurNn8zb//9NNutNuhz31f////9vt///z+IdAEAAAK4LQIAKobHItEIYCGAExBwe8jcToF9zIKrEdDYIuP2MgOWFSE34wYiR5iqQPj0JIeoVdlG4VD4XA67mAcNa1fhzA1jwHuTRxDUQ//iYBczjHiTJcIuPyKlHQkv/LHQUYkuSi57yQT//uggfZNajQ3Vmz+Zt//+mm3Wm3Q576v////+32///5/EOgAAADVghQAAAAA//uQZAUAB1WI0PZugAAAAAoQwAAAEk3nRd2qAAAAACiDgAAAAAAABCqEEQRLCgwpBGMlJkIz8jKhGvj4k6jzRnqasNKIeoh5gI7BJaC1A1AoNBjJgbyApVS4IDlZgDU5WUAxEKDNmmALHzZp0Fkz1FMTmGFl1FMEyodIavcCAUHDWrKAIA4aa2oCgILEBupZgHvAhEBcZ6joQBxS76AgccrFlczBvKLC0QI2cBoCFvfTDAo7eoOQInqDPBtvrDEZBNYN5xwNwxQRfw8ZQ5wQVLvO8OYU+mHvFLlDh05Mdg7BT6YrRPpCBznMB2r//xKJjyyOh+cImr2/4doscwD6neZjuZR4AgAABYAAAABy1xcdQtxYBYYZdifkUDgzzXaXn98Z0oi9ILU5mBjFANmRwlVJ3/6jYDAmxaiDG3/6xjQQCCKkRb/6kg/wW+kSJ5//rLobkLSiKmqP/0ikJuDaSaSf/6JiLYLEYnW/+kXg1WRVJL/9EmQ1YZIsv/6Qzwy5qk7/+tEU0nkls3/zIUMPKNX/6yZLf+kFgAfgGyLFAUwY//uQZAUABcd5UiNPVXAAAApAAAAAE0VZQKw9ISAAACgAAAAAVQIygIElVrFkBS+Jhi+EAuu+lKAkYUEIsmEAEoMeDmCETMvfSHTGkF5RWH7kz/ESHWPAq/kcCRhqBtMdokPdM7vil7RG98A2sc7zO6ZvTdM7pmOUAZTnJW+NXxqmd41dqJ6mLTXxrPpnV8avaIf5SvL7pndPvPpndJR9Kuu8fePvuiuhorgWjp7Mf/PRjxcFCPDkW31srioCExivv9lcwKEaHsf/7ow2Fl1T/9RkXgEhYElAoCLFtMArxwivDJJ+bR1HTKJdlEoTELCIqgEwVGSQ+hIm0NbK8WXcTEI0UPoa2NbG4y2K00JEWbZavJXkYaqo9CRHS55FcZTjKEk3NKoCYUnSQ0rWxrZbFKbKIhOKPZe1cJKzZSaQrIyULHDZmV5K4xySsDRKWOruanGtjLJXFEmwaIbDLX0hIPBUQPVFVkQkDoUNfSoDgQGKPekoxeGzA4DUvnn4bxzcZrtJyipKfPNy5w+9lnXwgqsiyHNeSVpemw4bWb9psYeq//uQZBoABQt4yMVxYAIAAAkQoAAAHvYpL5m6AAgAACXDAAAAD59jblTirQe9upFsmZbpMudy7Lz1X1DYsxOOSWpfPqNX2WqktK0DMvuGwlbNj44TleLPQ+Gsfb+GOWOKJoIrWb3cIMeeON6lz2umTqMXV8Mj30yWPpjoSa9ujK8SyeJP5y5mOW1D6hvLepeveEAEDo0mgCRClOEgANv3B9a6fikgUSu/DmAMATrGx7nng5p5iimPNZsfQLYB2sDLIkzRKZOHGAaUyDcpFBSLG9MCQALgAIgQs2YunOszLSAyQYPVC2YdGGeHD2dTdJk1pAHGAWDjnkcLKFymS3RQZTInzySoBwMG0QueC3gMsCEYxUqlrcxK6k1LQQcsmyYeQPdC2YfuGPASCBkcVMQQqpVJshui1tkXQJQV0OXGAZMXSOEEBRirXbVRQW7ugq7IM7rPWSZyDlM3IuNEkxzCOJ0ny2ThNkyRai1b6ev//3dzNGzNb//4uAvHT5sURcZCFcuKLhOFs8mLAAEAt4UWAAIABAAAAAB4qbHo0tIjVkUU//uQZAwABfSFz3ZqQAAAAAngwAAAE1HjMp2qAAAAACZDgAAAD5UkTE1UgZEUExqYynN1qZvqIOREEFmBcJQkwdxiFtw0qEOkGYfRDifBui9MQg4QAHAqWtAWHoCxu1Yf4VfWLPIM2mHDFsbQEVGwyqQoQcwnfHeIkNt9YnkiaS1oizycqJrx4KOQjahZxWbcZgztj2c49nKmkId44S71j0c8eV9yDK6uPRzx5X18eDvjvQ6yKo9ZSS6l//8elePK/Lf//IInrOF/FvDoADYAGBMGb7FtErm5MXMlmPAJQVgWta7Zx2go+8xJ0UiCb8LHHdftWyLJE0QIAIsI+UbXu67dZMjmgDGCGl1H+vpF4NSDckSIkk7Vd+sxEhBQMRU8j/12UIRhzSaUdQ+rQU5kGeFxm+hb1oh6pWWmv3uvmReDl0UnvtapVaIzo1jZbf/pD6ElLqSX+rUmOQNpJFa/r+sa4e/pBlAABoAAAAA3CUgShLdGIxsY7AUABPRrgCABdDuQ5GC7DqPQCgbbJUAoRSUj+NIEig0YfyWUho1VBBBA//uQZB4ABZx5zfMakeAAAAmwAAAAF5F3P0w9GtAAACfAAAAAwLhMDmAYWMgVEG1U0FIGCBgXBXAtfMH10000EEEEEECUBYln03TTTdNBDZopopYvrTTdNa325mImNg3TTPV9q3pmY0xoO6bv3r00y+IDGid/9aaaZTGMuj9mpu9Mpio1dXrr5HERTZSmqU36A3CumzN/9Robv/Xx4v9ijkSRSNLQhAWumap82WRSBUqXStV/YcS+XVLnSS+WLDroqArFkMEsAS+eWmrUzrO0oEmE40RlMZ5+ODIkAyKAGUwZ3mVKmcamcJnMW26MRPgUw6j+LkhyHGVGYjSUUKNpuJUQoOIAyDvEyG8S5yfK6dhZc0Tx1KI/gviKL6qvvFs1+bWtaz58uUNnryq6kt5RzOCkPWlVqVX2a/EEBUdU1KrXLf40GoiiFXK///qpoiDXrOgqDR38JB0bw7SoL+ZB9o1RCkQjQ2CBYZKd/+VJxZRRZlqSkKiws0WFxUyCwsKiMy7hUVFhIaCrNQsKkTIsLivwKKigsj8XYlwt/WKi2N4d//uQRCSAAjURNIHpMZBGYiaQPSYyAAABLAAAAAAAACWAAAAApUF/Mg+0aohSIRobBAsMlO//Kk4soosy1JSFRYWaLC4qZBYWFRGZdwqKiwkNBVmoWFSJkWFxX4FFRQWR+LsS4W/rFRb/////////////////////////////////////////////////////////////////////////////////////////////////////////////////////////////////////////////////////////////////////////////////////////////////////////////////////////////////////////////////////////////////////////////////////////////////////////////////////////////////////////////////////////////////////////////////////////////////////////////////////////////////VEFHAAAAAAAAAAAAAAAAAAAAAAAAAAAAAAAAAAAAAAAAU291bmRib3kuZGUAAAAAAAAAAAAAAAAAAAAAAAAAAAAAAAAAAAAAAAAAAAAAAAAAAAAAAAAAAAAAAAAAMjAwNGh0dHA6Ly93d3cuc291bmRib3kuZGUAAAAAAAAAACU=')
audio.play()
}
const formatTime = (seconds: number): string => {
const mins = Math.floor(seconds / 60)
const secs = seconds % 60
return \`\${mins.toString().padStart(2, "0")}:\${secs.toString().padStart(2, "0")}\`
}
const adjustTime = (type: 'focus' | 'break', amount: number) => {
if (type === 'focus') {
const newTime = Math.max(1, Math.min(60, focusTime + amount))
setFocusTime(newTime)
if (mode === 'focus') setTimeLeft(newTime * 60)
} else {
const newTime = Math.max(1, Math.min(15, breakTime + amount))
setBreakTime(newTime)
if (mode === 'break') setTimeLeft(newTime * 60)
}
}
return (
<div className="min-h-screen flex items-center justify-center bg-gray-50 p-4">
<Card className="w-full max-w-md">
<CardHeader>
<CardTitle className="text-2xl text-center">Pomodoro Timer</CardTitle>
</CardHeader>
<CardContent className="space-y-6">
<div className="flex justify-center space-x-4">
<Button
variant={mode === 'focus' ? 'default' : 'outline'}
onClick={() => {
setMode('focus')
setTimeLeft(focusTime * 60)
setIsActive(false)
}}
>
Focus
</Button>
<Button
variant={mode === 'break' ? 'default' : 'outline'}
onClick={() => {
setMode('break')
setTimeLeft(breakTime * 60)
setIsActive(false)
}}
>
Break
</Button>
</div>
<div className="text-center">
<div className="text-6xl font-bold mb-8">{formatTime(timeLeft)}</div>
<div className="grid grid-cols-2 gap-4 mb-6">
<div className="space-y-2">
<p className="text-sm font-medium">Focus Time</p>
<div className="flex justify-center items-center space-x-2">
<Button
variant="outline"
size="sm"
onClick={() => adjustTime('focus', -1)}
>
-
</Button>
<span className="w-16 text-center">{focusTime}m</span>
<Button
variant="outline"
size="sm"
onClick={() => adjustTime('focus', 1)}
>
+
</Button>
</div>
</div>
<div className="space-y-2">
<p className="text-sm font-medium">Break Time</p>
<div className="flex justify-center items-center space-x-2">
<Button
variant="outline"
size="sm"
onClick={() => adjustTime('break', -1)}
>
-
</Button>
<span className="w-16 text-center">{breakTime}m</span>
<Button
variant="outline"
size="sm"
onClick={() => adjustTime('break', 1)}
>
+
</Button>
</div>
</div>
</div>
<div className="flex justify-center space-x-4">
<Button
size="lg"
onClick={toggleTimer}
className="w-32"
>
{isActive ? <Pause className="w-4 h-4 mr-2" /> : <Play className="w-4 h-4 mr-2" />}
{isActive ? 'Pause' : 'Start'}
</Button>
<Button
size="lg"
variant="outline"
onClick={resetTimer}
className="w-32"
>
<X className="w-4 h-4 mr-2" />
Reset
</Button>
</div>
</div>
</CardContent>
</Card>
</div>
\`\`\`
`),
},
};
在上面的示例中,calculator app、quiz app、pomodoro timer 这几个示例的 response 并不是直接返回代码片段,而是自然语言描述和代码段的混合,代码段用 ```tsx{filename=pomodoro-timer.tsx} ``` 做了包裹。
二、核心执行入口
输入需求之后点击确认按钮发生了什么?
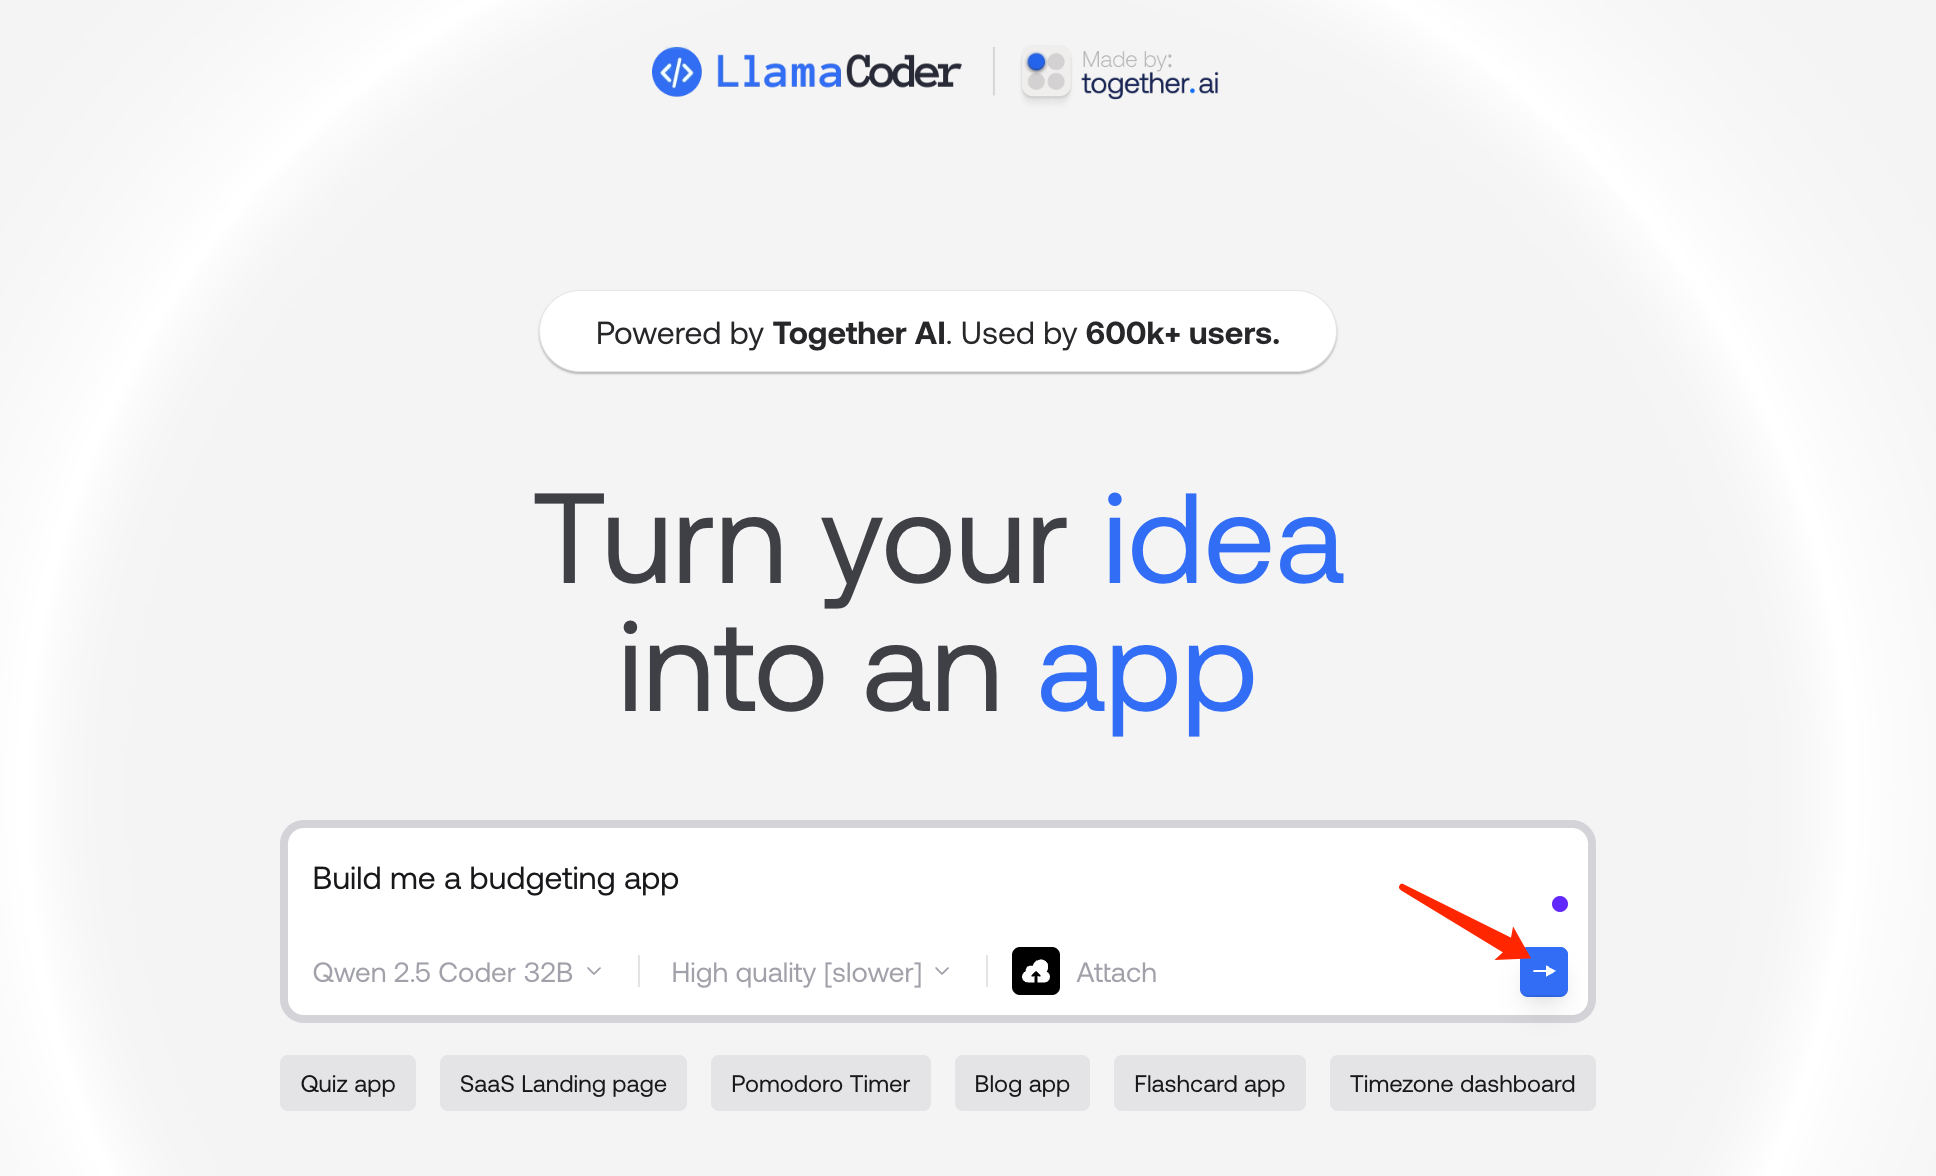
核心代码:
const { chatId, lastMessageId } = await createChat(
    prompt,
    model,
    quality,
    screenshotUrl
);

const { streamPromise } = await getNextCompletionStreamPromise(
    lastMessageId,
    model
);

startTransition(() => {
    setStreamPromise(streamPromise);
    router.push(`/chats/${chatId}`);
});
createChat(方法):
export async function createChat(
  prompt: string,
  model: string,
  quality: "high" | "low",
  screenshotUrl: string | undefined,
) {
  let options: ConstructorParameters<typeof Together>[0] = {};
  if (process.env.HELICONE_API_KEY) {
    options.baseURL = "https://together.helicone.ai/v1";
    options.defaultHeaders = {
      "Helicone-Auth": `Bearer ${process.env.HELICONE_API_KEY}`,
      "Helicone-Property-appname": "LlamaCoder",
    };
  }

  const together = new Together(options);

  async function fetchTitle() {
    const responseForChatTitle = await together.chat.completions.create({
      model: "meta-llama/Meta-Llama-3.1-8B-Instruct-Turbo",
      messages: [
        {
          role: "system",
          content:
            "You are a chatbot helping the user create a simple app or script, and your current job is to create a succinct title, maximum 3-5 words, for the chat given their initial prompt. Please return only the title.",
        },
        {
          role: "user",
          content: prompt,
        },
      ],
    });
    const title = responseForChatTitle.choices[0].message?.content || prompt;
    return title;
  }

  async function fetchTopExample() {
    const findSimilarExamples = await together.chat.completions.create({
      model: "meta-llama/Meta-Llama-3.1-8B-Instruct-Turbo",
      messages: [
        {
          role: "system",
          content: `You are a helpful bot. Given a request for building an app, you match it to the most similar example provided. If the request is NOT similar to any of the provided examples, return "none". Here is the list of examples, ONLY reply with one of them OR "none":

          - landing page
          - blog app
          - quiz app
          - pomodoro timer
          `,
        },
        {
          role: "user",
          content: prompt,
        },
      ],
    });

    const mostSimilarExample =
      findSimilarExamples.choices[0].message?.content || "none";
    return mostSimilarExample;
  }

  const [title, mostSimilarExample] = await Promise.all([
    fetchTitle(),
    fetchTopExample(),
  ]);

  let fullScreenshotDescription;
  if (screenshotUrl) {
    const screenshotResponse = await together.chat.completions.create({
      model: "meta-llama/Llama-3.2-90B-Vision-Instruct-Turbo",
      temperature: 0.2,
      max_tokens: 1000,
      messages: [
        {
          role: "user",
          // @ts-expect-error Need to fix the TypeScript library type
          content: [
            { type: "text", text: screenshotToCodePrompt },
            {
              type: "image_url",
              image_url: {
                url: screenshotUrl,
              },
            },
          ],
        },
      ],
    });

    fullScreenshotDescription = screenshotResponse.choices[0].message?.content;
  }

  let userMessage: string;
  if (quality === "high") {
    let initialRes = await together.chat.completions.create({
      model: "Qwen/Qwen2.5-Coder-32B-Instruct",
      messages: [
        {
          role: "system",
          content: softwareArchitectPrompt,
        },
        {
          role: "user",
          content: fullScreenshotDescription
            ? fullScreenshotDescription + prompt
            : prompt,
        },
      ],
      temperature: 0.2,
      max_tokens: 3000,
    });

    userMessage = initialRes.choices[0].message?.content ?? prompt;
  } else {
    userMessage =
      prompt +
      "RECREATE THIS APP AS CLOSELY AS POSSIBLE: " +
      fullScreenshotDescription;
  }

  const chat = await prisma.chat.create({
    data: {
      model,
      quality,
      prompt,
      title,
      shadcn: true,
      messages: {
        createMany: {
          data: [
            {
              role: "system",
              content: getMainCodingPrompt(mostSimilarExample),
              position: 0,
            },
            { role: "user", content: userMessage, position: 1 },
          ],
        },
      },
    },
    include: {
      messages: true,
    },
  });

  const lastMessage = chat.messages
    .sort((a, b) => a.position - b.position)
    .at(-1);
  if (!lastMessage) throw new Error("No new message");

  return {
    chatId: chat.id,
    lastMessageId: lastMessage.id,
  };
}
代码分析:
- 创建
together-ai实例:设置了baseURL和defaultHeaders参数,defaultHeaders中包含Helicone-Auth和Helicone-Property-appname。Together AI:https://www.together.ai/; - 获取标题
fetchTitle:使用meta-llama/Meta-Llama-3.1-8B-Instruct-Turbo模型将用户的输入总结为一个标题,提示词:“你是一个帮助用户创建简单应用或脚本的聊天机器人,你当前的任务是根据用户的初始提示为对话创建一个简洁的标题,最多 3-5 个词。请只返回标题。”; - 获取与用户输入最相似的示例
fetchTopExample:使用meta-llama/Meta-Llama-3.1-8B-Instruct-Turbo,提示词:“你是一个乐于助人的机器人。当收到构建应用的请求时,你需要将其匹配到最相似的示例。如果该请求与提供的任何示例都不相似,则返回 “none”。以下是示例列表,只能回复其中之一或 “none”: landing page、blog app、quiz app、pomodoro timer”。这个方法的返回结果会作为prompt.ts中getMainCodingPrompt方法的入参,匹配到相关示例作为 prompt 中的补充示例; - 如果用户上传了截图
screenshotUrl,获取对截图中进行页面要素分析的结果:调用meta-llama/Llama-3.2-90B-Vision-Instruct-Turbo模型,将prompt.ts中screenshotToCodePrompt作为 prompt 输入,返回的结果赋值给fullScreenshotDescription变量; - 如果用户选择了高质量回复,使用
Qwen/Qwen2.5-Coder-32B-Instruct模型结合softwareArchitectPrompt及用户和截图描述生成完整的页面生成计划描述,将此作为处理后的用户输入;如果选择低质量回复,则处理后的用户输入为: prompt + “尽可能精确地重新创建这个应用” +fullScreenshotDescription; - 将相关信息使用 prisma 保存到相关表(Chat、Message - Chat 和 Message 是一对多的关系)中,其中 content 为
getMainCodingPrompt(mostSimilarExample) 的结果; - 返回
chatId和lastMessageId
createChat 这个方法主要是对用户输入进行了精细化的处理,得到了信息更完善的输入。
getNextCompletionStreamPromise(方法):
export async function getNextCompletionStreamPromise(
  messageId: string,
  model: string,
) {
  const message = await prisma.message.findUnique({ where: { id: messageId } });
  if (!message) notFound();

  const messagesRes = await prisma.message.findMany({
    where: { chatId: message.chatId, position: { lte: message.position } },
    orderBy: { position: "asc" },
  });

  const messages = z
    .array(
      z.object({
        role: z.enum(["system", "user", "assistant"]),
        content: z.string(),
      }),
    )
    .parse(messagesRes);

  let options: ConstructorParameters<typeof Together>[0] = {};
  if (process.env.HELICONE_API_KEY) {
    options.baseURL = "https://together.helicone.ai/v1";
    options.defaultHeaders = {
      "Helicone-Auth": `Bearer ${process.env.HELICONE_API_KEY}`,
      "Helicone-Property-appname": "LlamaCoder",
      "Helicone-Property-chatId": message.chatId,
    };
  }

  const together = new Together(options);

  return {
    streamPromise: new Promise<ReadableStream>(async (resolve) => {
      const res = await together.chat.completions.create({
        model,
        messages: messages.map((m) => ({ role: m.role, content: m.content })),
        stream: true,
        temperature: 0.2,
        max_tokens: 9000,
      });

      resolve(res.toReadableStream());
    }),
  };
}
代码分析:
- 根据
lastMessageId查找最新一条消息记录(这条就是刚创建的); - 根据这条消息记录绑定的
chatId,获取这个messageId之前的所有消息(包含当前消息),按position升序排列; - 使用
Zod库进行数据验证:必须包含 role(只能是 system,user, assistant 之一);必须包含 content(必须是字符串类型); - 创建
together-ai实例:设置了baseURL和defaultHeaders参数,defaultHeaders包含Helicone-Auth`` 、Helicone-Property-appName、Helicone-Property-chatId`; - 返回对象,key 为
streamPromise,一个流式的 Promise 实例,其中messages参数是将前一步获取的所有消息组装成了一个数组